Why Use Fauxpilot?
Fauxpilot is an open-source alternative to GitHub Copilot, leveraging the power of large-scale models to deliver a range of AI-driven functionalities, including dialogue and code suggestions. In this article, we’ll focus exclusively on its code suggestion capabilities, with other features to be detailed in future posts.
Local Setup
To run Fauxpilot, the following prerequisites must be met:
- A Windows or Linux system with an NVIDIA graphics card.
- At least 50GB of local storage space (required for the large model).
- Docker and nvidia-container-toolkit.
- The
curlandzstdcommand-line tools, necessary for model downloads.
I am using Ubuntu.
The Docker installation is simple and won’t be elaborated here. The NVIDIA Container Toolkit is a project that enables containers to utilize NVIDIA GPU resources. The following commands can be used for installation:
1 | # Configure the production repository: |
Then, simply restart Docker:
1 | sudo systemctl restart docker |
Installation methods for other systems can be found in the complete installation guide.
Next, enter the project root directory and run the startup script directly:
1 | cd fauxpilot |
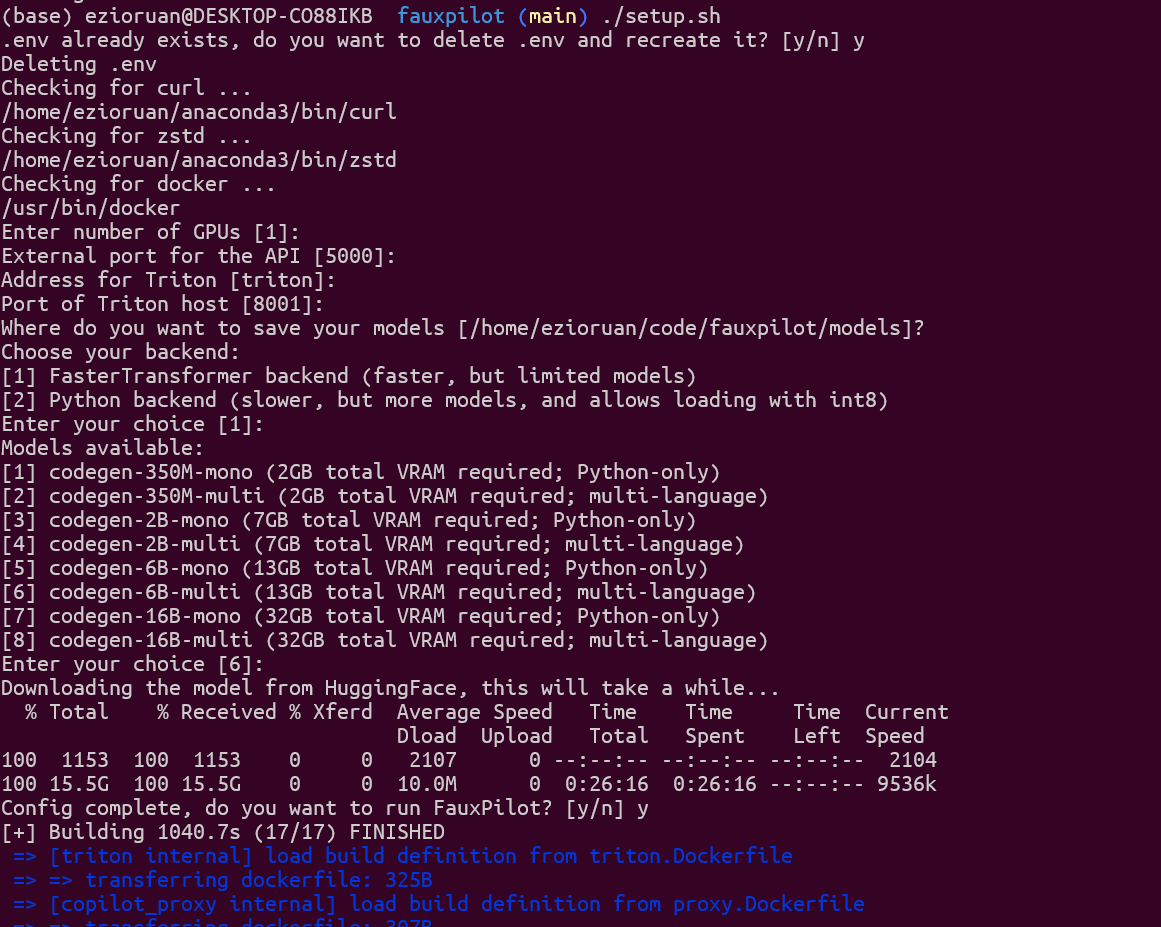
After that, you can use launch.sh and shutdown.sh to start and stop the service.
When launching, you will be presented with some parameters to choose from; pressing Enter to maintain the defaults is fine. My graphics card has 16GB of VRAM, and the codegen-6B-multi model was selected by default, which requires 13GB of VRAM. However, after actual testing, this led to VRAM overflow, and switching to the codegen-2B-multi model was more stable. Everyone should choose according to their hardware situation. The official GPU support matrix also lists the supported models.
Then you just wait for the model to finish downloading and it will start automatically. The first launch might be a bit slow.
Once you see the graphics card’s performance metrics being printed, like the following information, it’s ready to use:
1 | triton-1 | |
At this point, we can use the command line to test if it’s successful:
1 | curl --location 'http://localhost:5000/v1/engines/codegen/completions' \ |
If you see prompt content being output, it’s successful.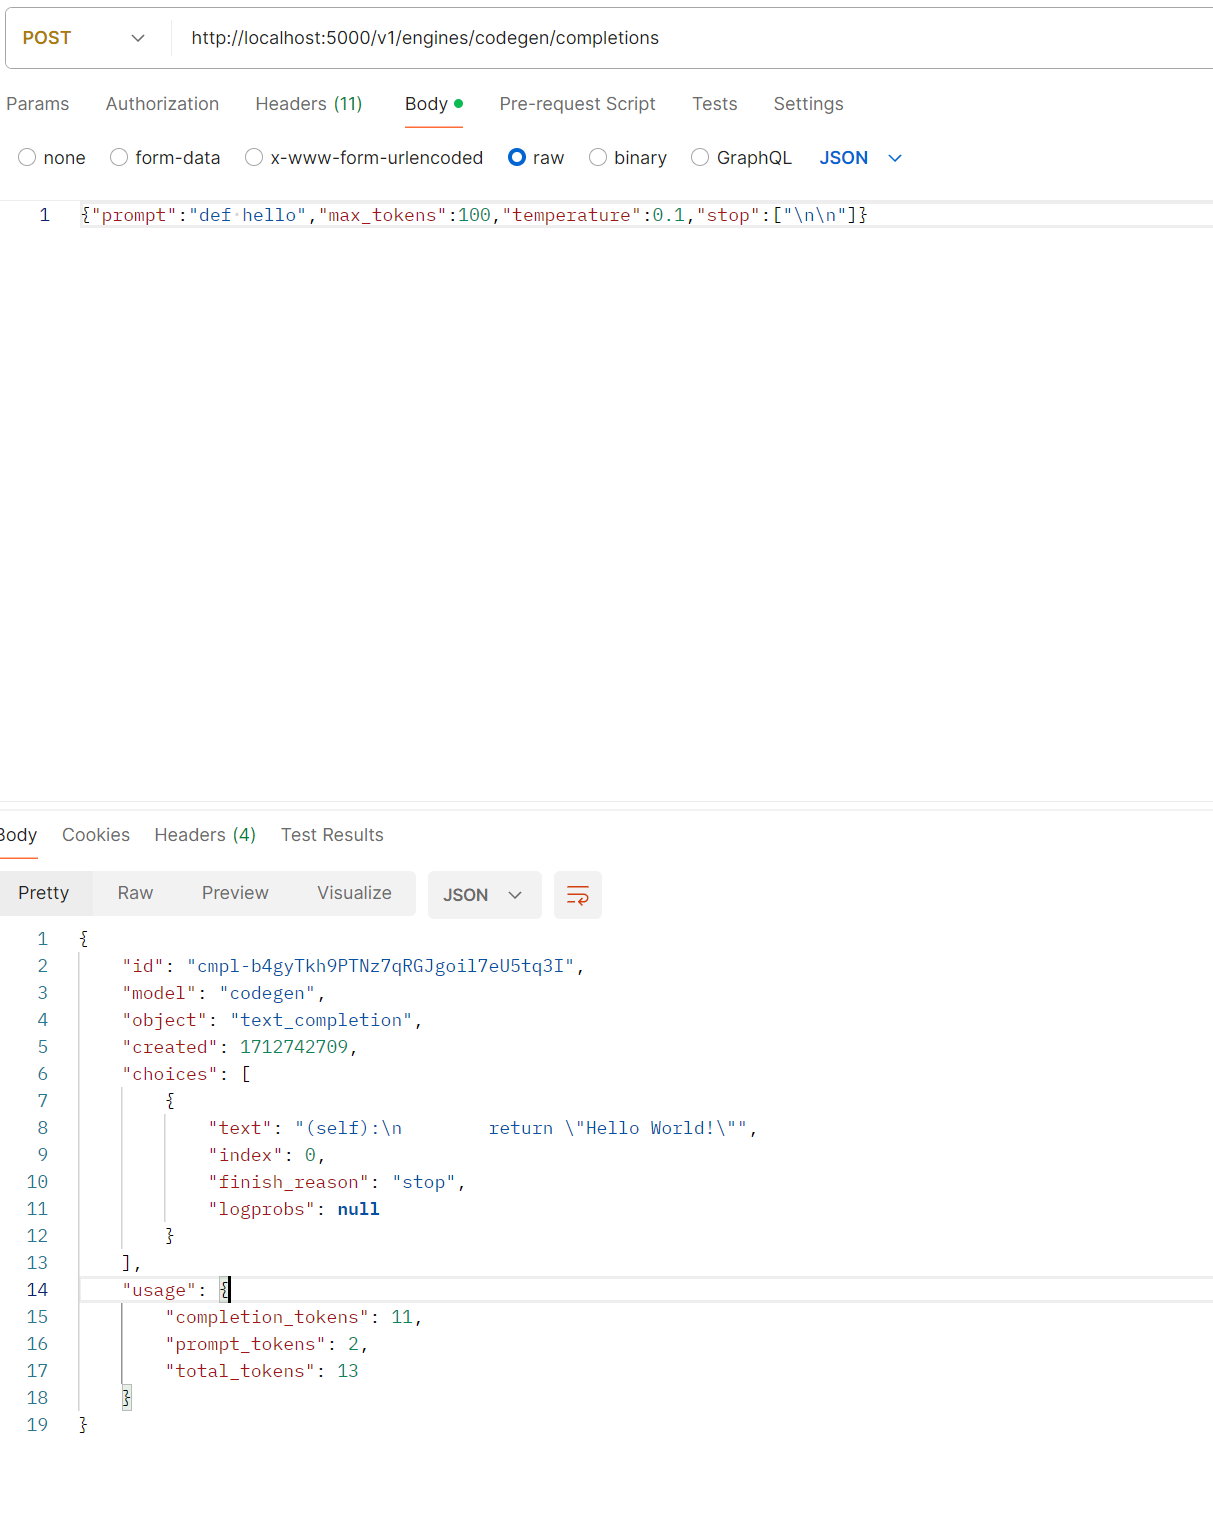
Configuring the Editor
The configuration for VSCODE is quite straightforward; we just need to switch to our address in the plugin settings. Open setting.json and edit the following content:
1 | "github.copilot.advanced": { |
The configuration for VIM is a bit more complex. The copilot.vim official site does not provide an API address override parameter, and the g:copilot_proxy parameter is just a regular request proxy feature. Therefore, we need to modify its API call address. Locate the installation directory of your copilot.vim plugin and then run the following commands to replace it:
1 | sed 's|https://api.github.com/copilot_internal|http://127.0.0.1:5000/copilot_internal|g' -i copilot.vim/copilot/dist/agent.js |
After restarting, you can see the effect.
Conclusion
In practice, the speed in simple projects is similar to the official version, but in larger projects (over 500 files), the speed is slower, which is probably related to the model’s precision. Those with better hardware conditions can choose better graphics card resources for processing. It is also a convenient local alternative solution. Compared to the official version, which costs $20 per month, this is a more cost-effective option for friends with graphics cards.