—title: “Docker Best Practices: Writing Optimized and Secure Dockerfiles”date: 2022-10-05 11:20:00tags: Docker, Containerization, DevOps, Best Practices—Docker has revolutionized how we build, ship, and run applications. At the heart of a good container is a well-crafted Dockerfile. While it’s easy to get an application running in a container, creating an image that is small, secure, and fast requires following a set of best practices. This guide covers the essentials for writing optimized and secure Dockerfiles.
Beyond Basic Prompts: Understanding Retrieval-Augmented Generation (RAG) in AI Apps
Large Language Models (LLMs) like GPT-4 are incredibly powerful, but they have two fundamental limitations: they don’t know anything about events that occurred after their training cut-off date, and they don’t have access to your private, domain-specific data. This can lead to outdated or generic responses. The solution to this problem is a powerful architectural pattern called Retrieval-Augmented Generation (RAG).
Use Fauxpilot as an alternative to GitHub Copilot for offline code assistance in VSCode and Vim.
Why Use Fauxpilot?
Fauxpilot is an open-source alternative to GitHub Copilot, leveraging the power of large-scale models to deliver a range of AI-driven functionalities, including dialogue and code suggestions. In this article, we’ll focus exclusively on its code suggestion capabilities, with other features to be detailed in future posts.
Local Setup
To run Fauxpilot, the following prerequisites must be met:
- A Windows or Linux system with an NVIDIA graphics card.
- At least 50GB of local storage space (required for the large model).
- Docker and nvidia-container-toolkit.
- The
curlandzstdcommand-line tools, necessary for model downloads.
I am using Ubuntu.
The Docker installation is simple and won’t be elaborated here. The NVIDIA Container Toolkit is a project that enables containers to utilize NVIDIA GPU resources. The following commands can be used for installation:
1 | # Configure the production repository: |
Then, simply restart Docker:
1 | sudo systemctl restart docker |
Installation methods for other systems can be found in the complete installation guide.
Next, enter the project root directory and run the startup script directly:
1 | cd fauxpilot |
The New King of Python Packaging? A First Look at `uv`
The Python packaging ecosystem is powerful but notoriously fragmented. A typical project might use venv for environments, pip for installation, pip-tools for locking dependencies, and maybe pipx for running tools in isolation. This collection of tools, while functional, can be confusing for newcomers and cumbersome for experts. Enter uv, a new tool from Astral (the creators of the ruff linter) that aims to change everything.
Building LLM Apps Without the Hassle: An Introduction to Dify and FastGPT
The rise of Large Language Models (LLMs) has opened a new frontier for application development. However, building, deploying, and managing these AI-powered apps can be complex, involving everything from prompt engineering to backend service management. To address this, a new category of tools has emerged: LLM-Ops platforms. Among the most popular open-source options are Dify and FastGPT, which aim to simplify the entire lifecycle of creating and managing LLM applications.
The Power of Agents in LangChain: Giving LLMs Tools and Autonomy
While Large Language Models (LLMs) are masters of language, their knowledge is static and they can’t interact with the outside world. They can’t check the current weather, perform a calculation, or look up information on a website. This is where the concept of Agents in LangChain comes in. An agent is a system that uses an LLM as its reasoning engine to decide which actions to take to accomplish a goal.
A Practical Guide to Training Your First Machine Learning Model with Scikit-learn
Machine learning can seem intimidating, often associated with complex mathematics and huge datasets. However, thanks to powerful libraries like Scikit-learn, training your first model is more accessible than ever. This guide will walk you through the fundamental steps of a machine learning project, from loading data to making predictions, using a classic example: classifying iris flowers.
How to Deploy a Fast One-Click Face Swapping Software on Hugging Face
1. Introduction to Hugging Face
Hugging Face is a platform that provides powerful tools and resources for the natural language processing (NLP) community. It offers various pre-trained models, APIs, and tools to simplify the development and deployment of NLP tasks for developers and researchers. The core mission of Hugging Face is to make NLP technology more accessible and shareable, promoting the advancement and democratization of artificial intelligence.
On Hugging Face, users can access a wide range of pre-trained models for tasks like text classification, question answering, language generation, and more. Additionally, Hugging Face allows users to create their own “Spaces” to store and share their models, code, and datasets. In this guide, we will focus on how to deploy a fast one-click face swapping software on Hugging Face.
2. Creating a Space and Uploading Code
To deploy a one-click face swapping software on Hugging Face, we first need to create a Hugging Face account and then create a new Space.
2.1 Create a Hugging Face Account
If you don’t have a Hugging Face account yet, head to the Hugging Face registration page and create a new account.
2.2 Login and Create a New Space
Login to Hugging Face, click the “Login” button in the top right corner, and enter your account credentials to log in.
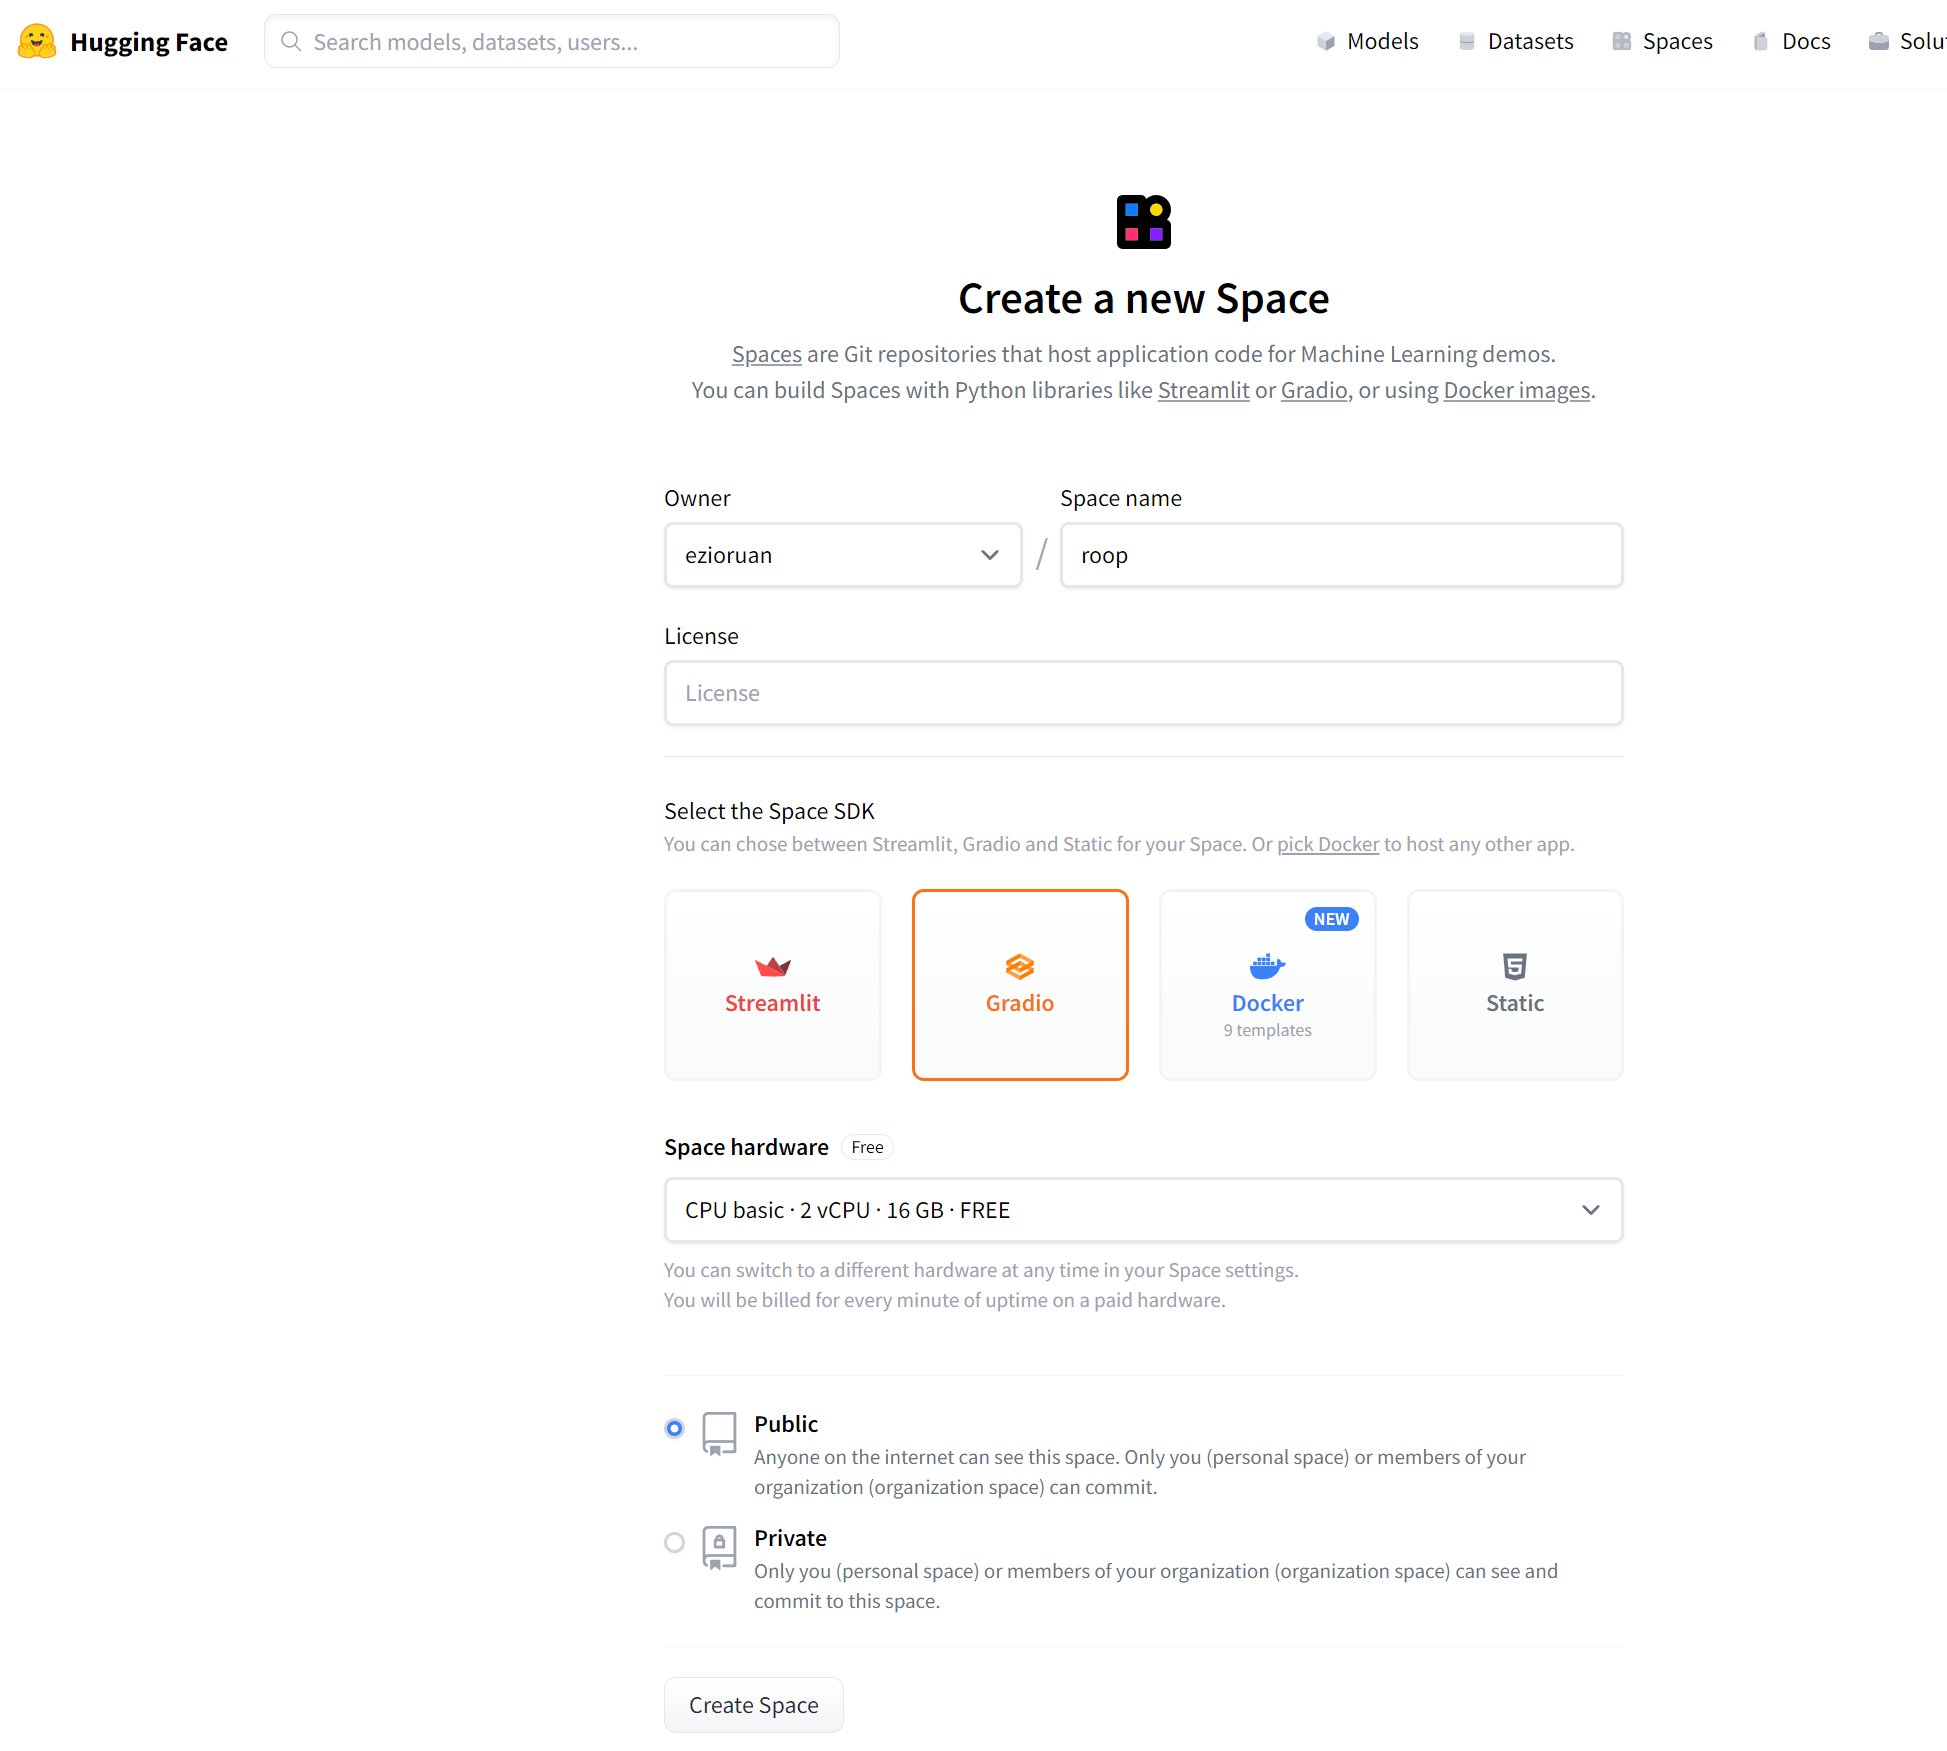
After logging in, you will see your username in the top right corner. Click on your username and select “Create a new space.”. and select the Space SDK Gradio
for space hardware, we will be using CPU.On the “Create a new space” page, provide a name and description for your Space. Choose a relevant name related to your one-click face swapping software and provide an appropriate description to let others know about your project.
Click “Create new space” to finish creating the Space.
2.3 Upload Code and Applications
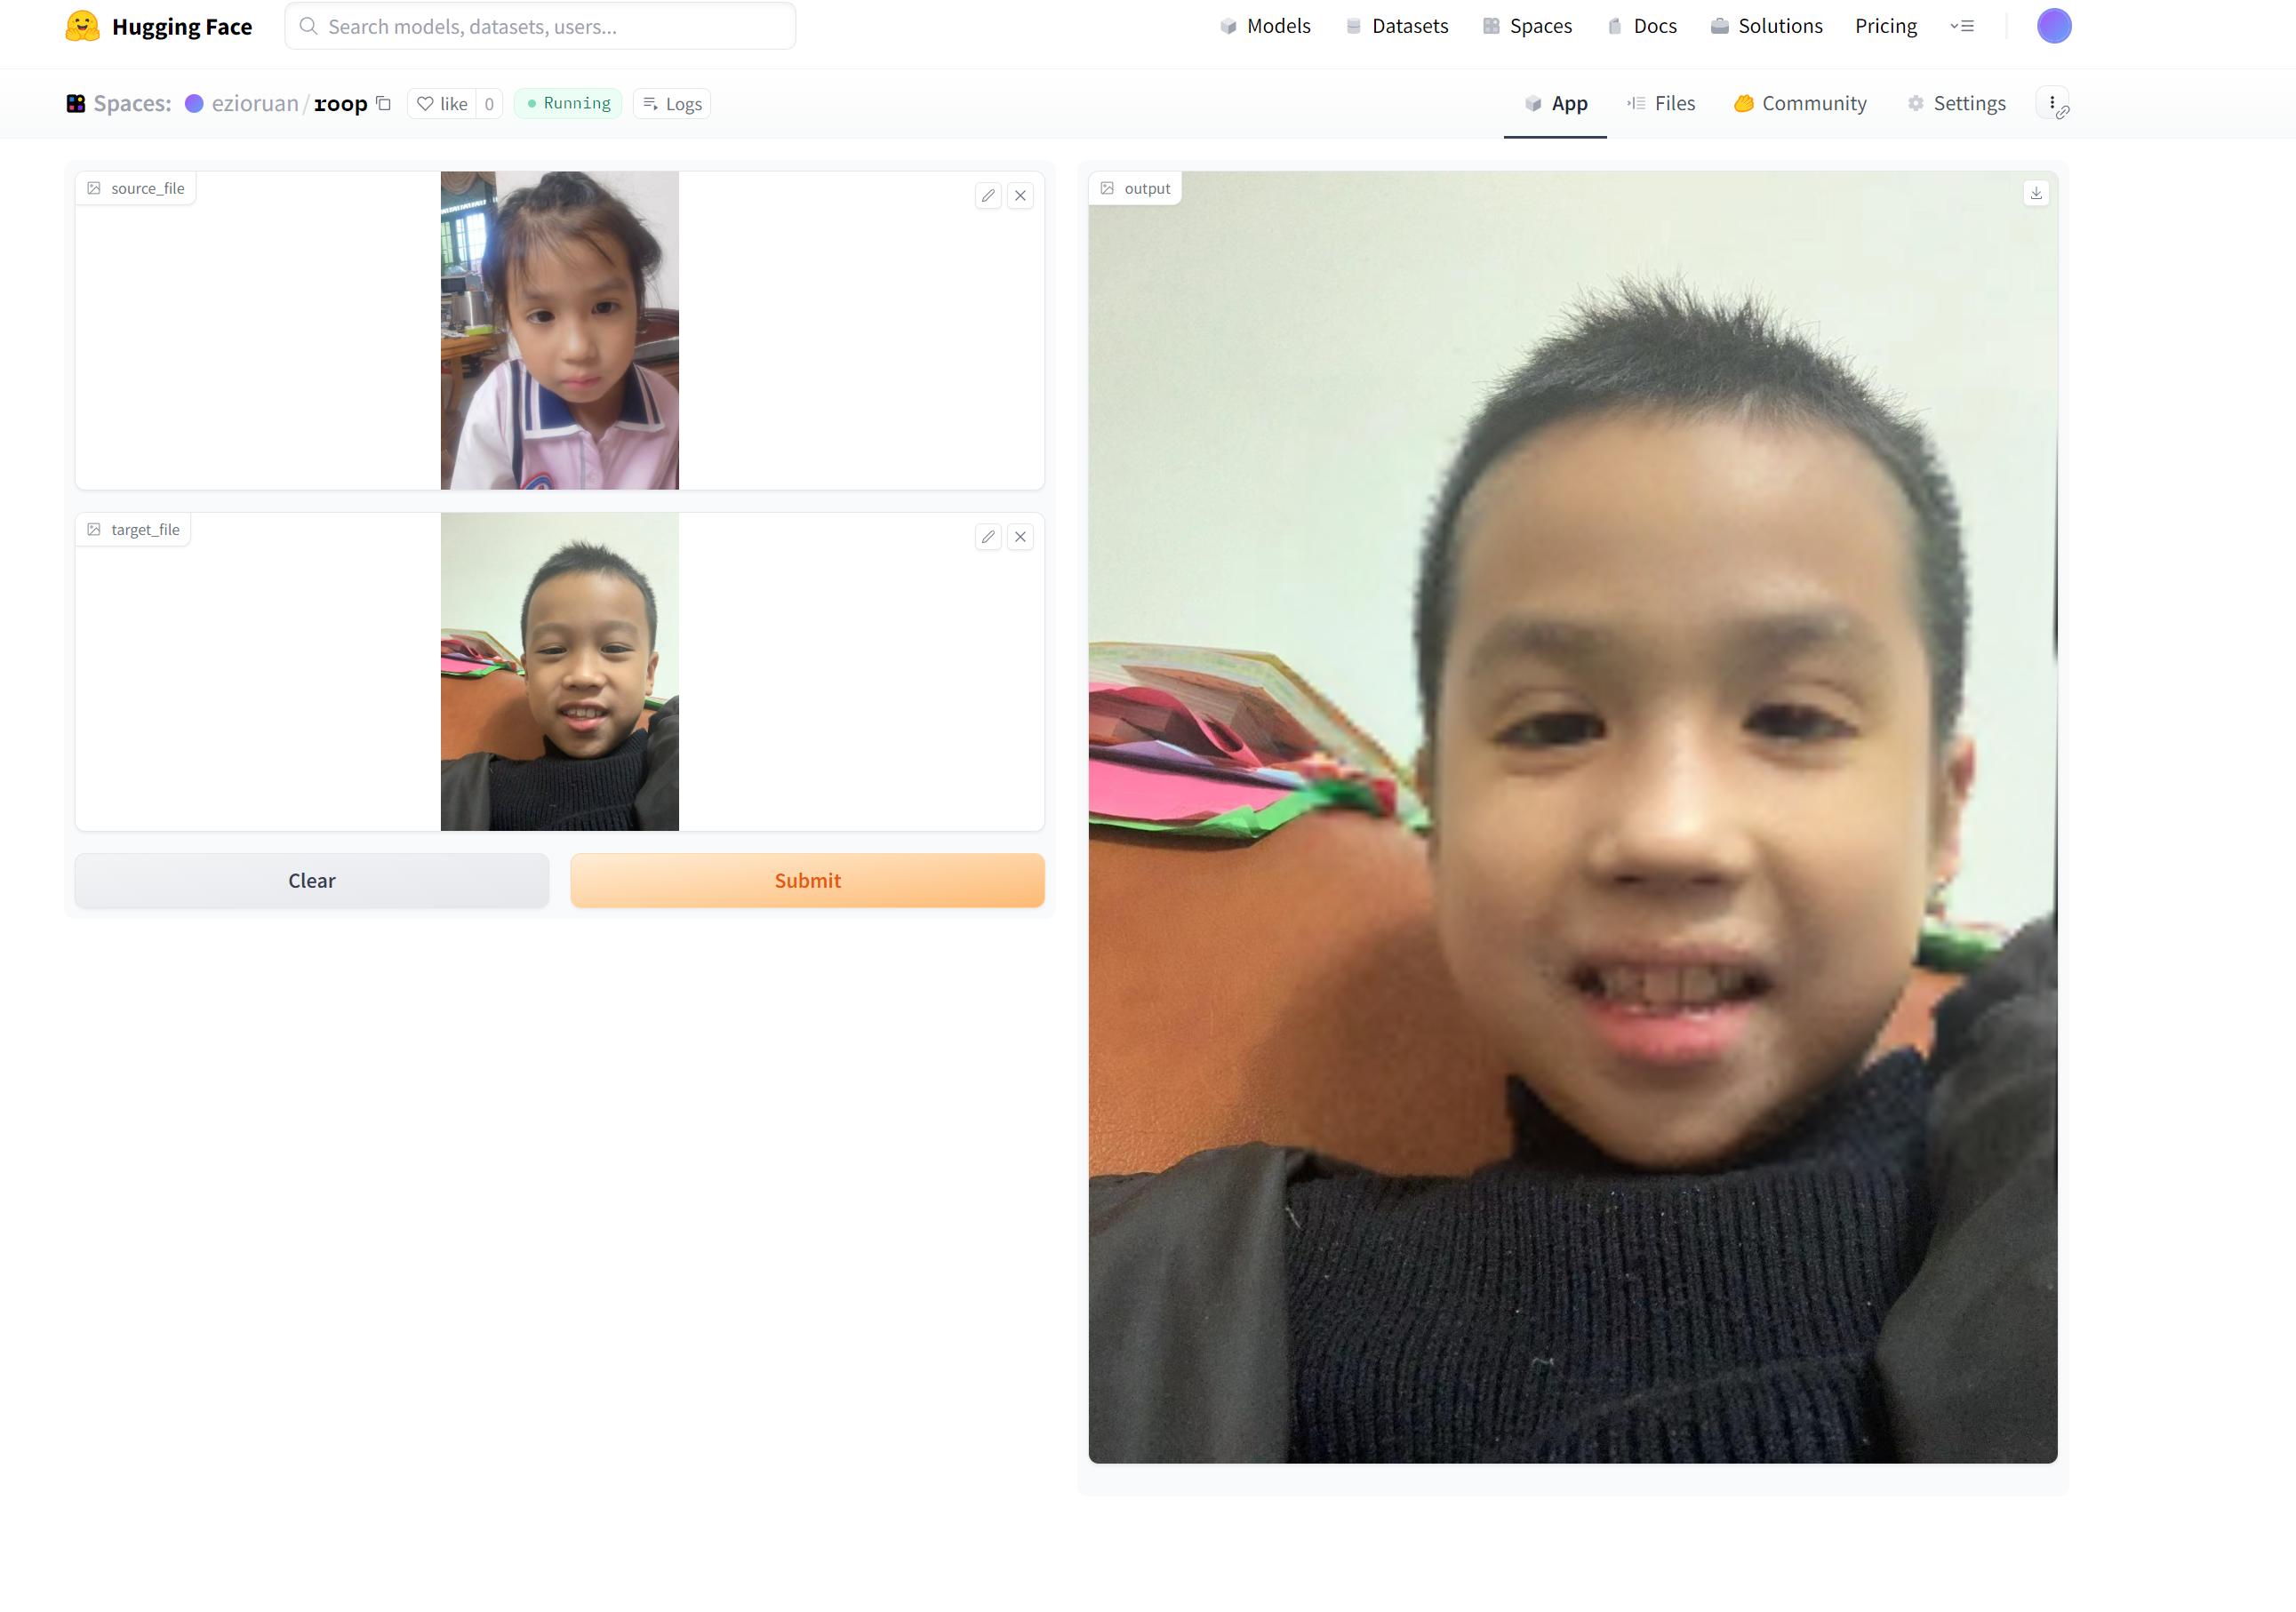
To deploy our one-click face swapping software, we will be using the roop repository available on GitHub. This software enables one-click face swapping for both images and videos by simply requiring users to upload a portrait image. For the purpose of this guide, we will focus on face swapping as an example. As we are using the free version of Hugging Face’s space, it currently supports CPU inference only.
To get started, clone the roop repository and create an app.py file.
we will call the core module in app.py using the following code:
1 | # -* coding:UTF-8 -* |
We will use Gradio to design the user interface for our program. The good news is that Hugging Face natively supports Gradio, so we don’t need to import any additional libraries.
Once you have written the program, you can push it to your Hugging Face space. After the push, the program will be automatically deployed. All you need to do is wait for the deployment to complete, and then you can start using the one-click face swapping software.
Remember, the deployment process is hassle-free and user-friendly, allowing you to focus on the exciting applications of your software.
Getting Started with LangChain: Building Your First LLM-Powered Application
If you’ve been exploring the world of Large Language Models (LLMs), you’ve likely heard of LangChain. It’s a powerful open-source framework designed to simplify the creation of applications powered by LLMs. LangChain provides a set of modular components and off-the-shelf “chains” that make it easy to build everything from simple prompt-response bots to complex, data-aware agents.
This guide will introduce you to the core concepts of LangChain and walk you through building your first LLM-powered application.
What Are Vector Databases? The Powerhouse Behind Modern AI Search
With the explosion of large language models (LLMs) and other deep learning applications, a new kind of data has become central to AI: vector embeddings. These dense numerical representations of text, images, or audio have one major problem—they are notoriously difficult to search efficiently. This is where a new type of database, the vector database, comes into play.